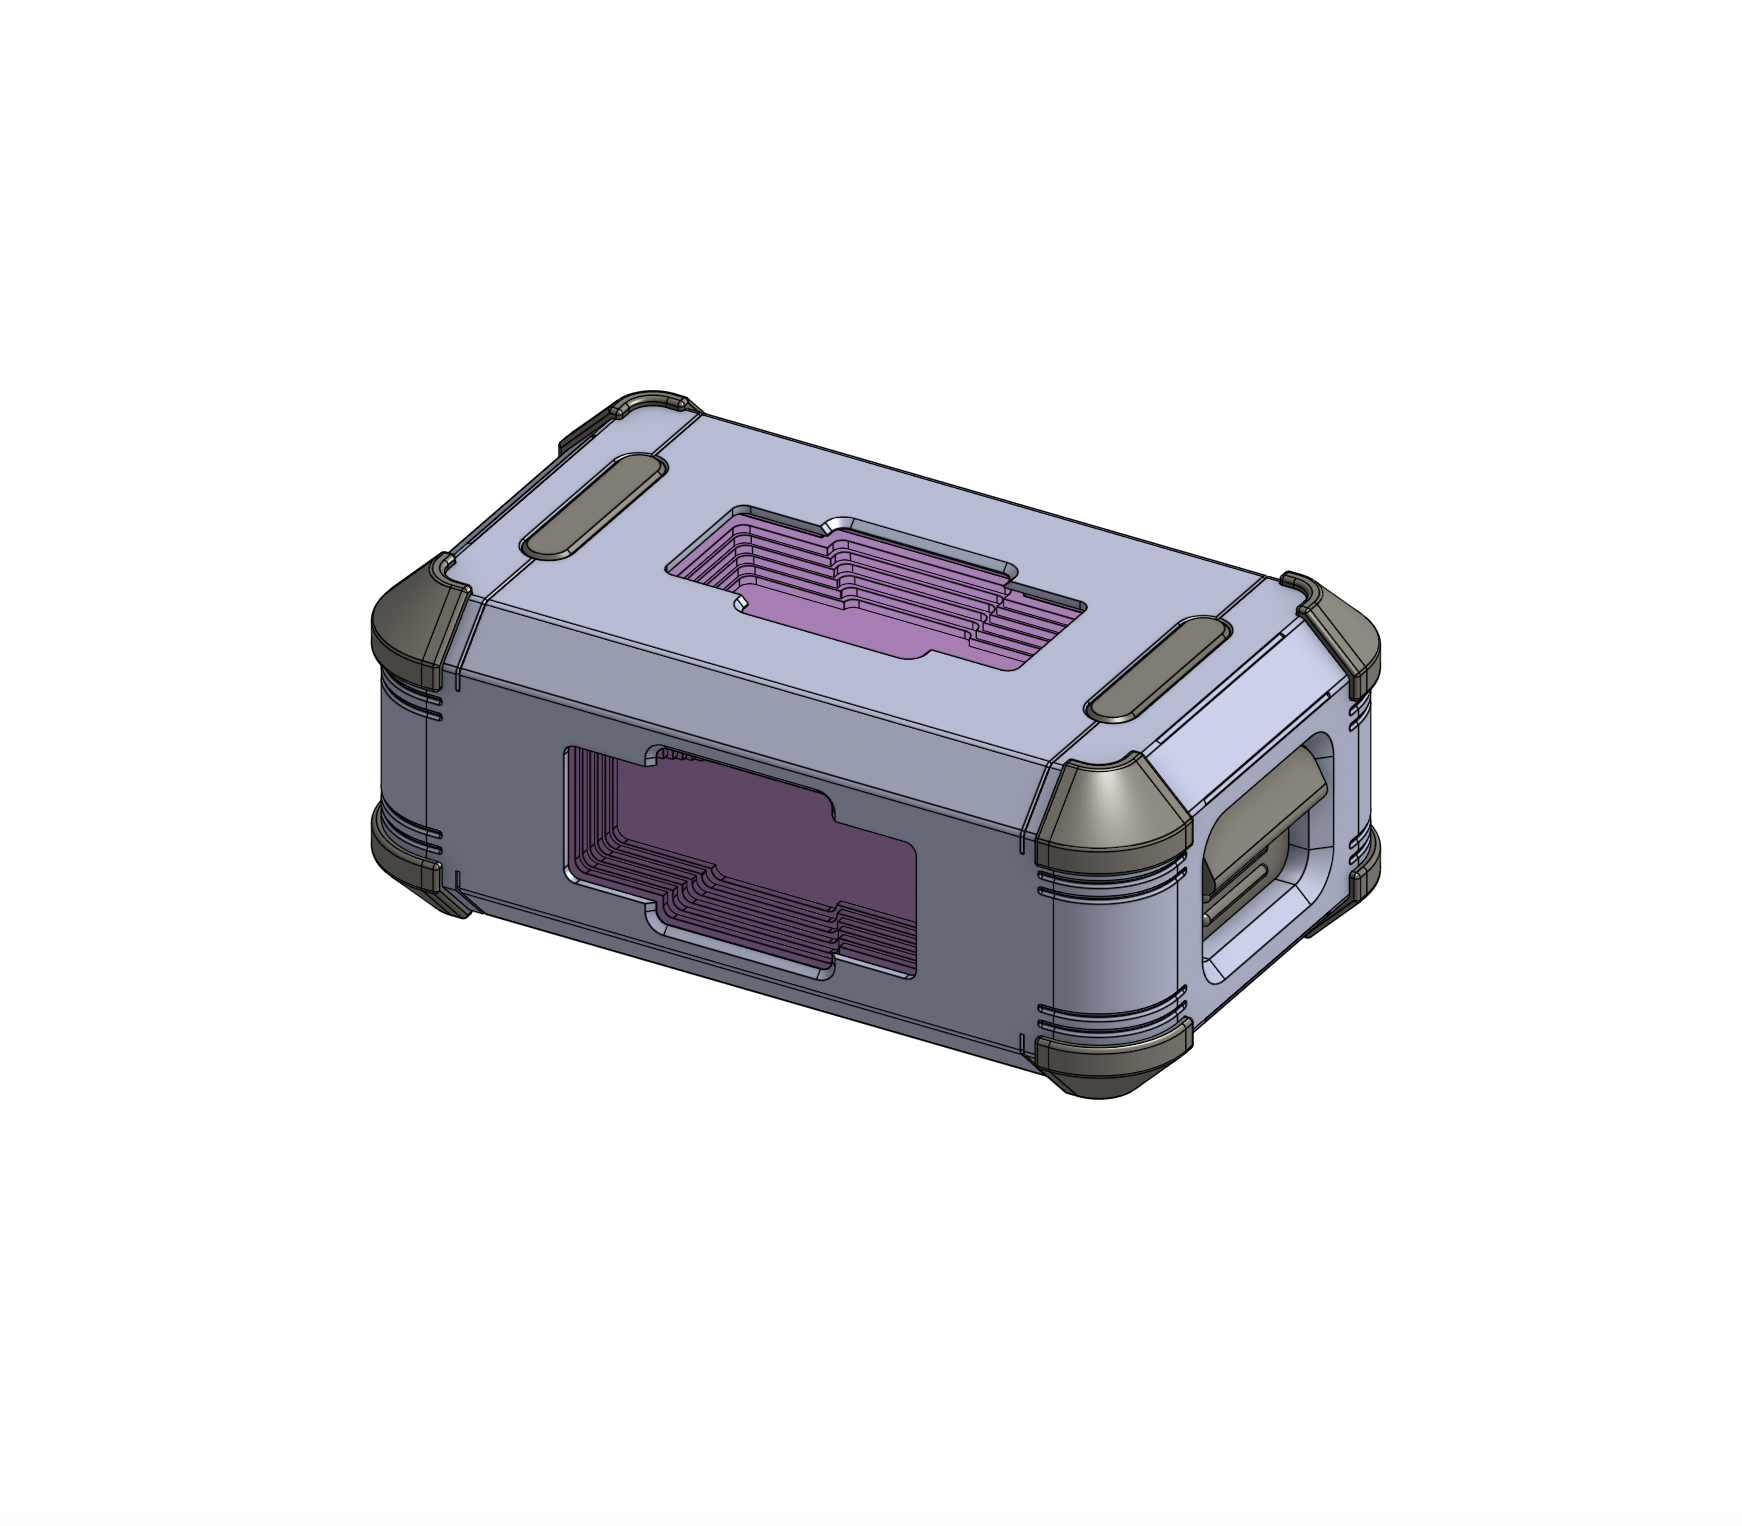
High Density Prismatic Unit


High Density Prismatic Unit
This item consists of digital 3D printable files. Like all of my other items, you will not receive anything physical from me if you buy this.
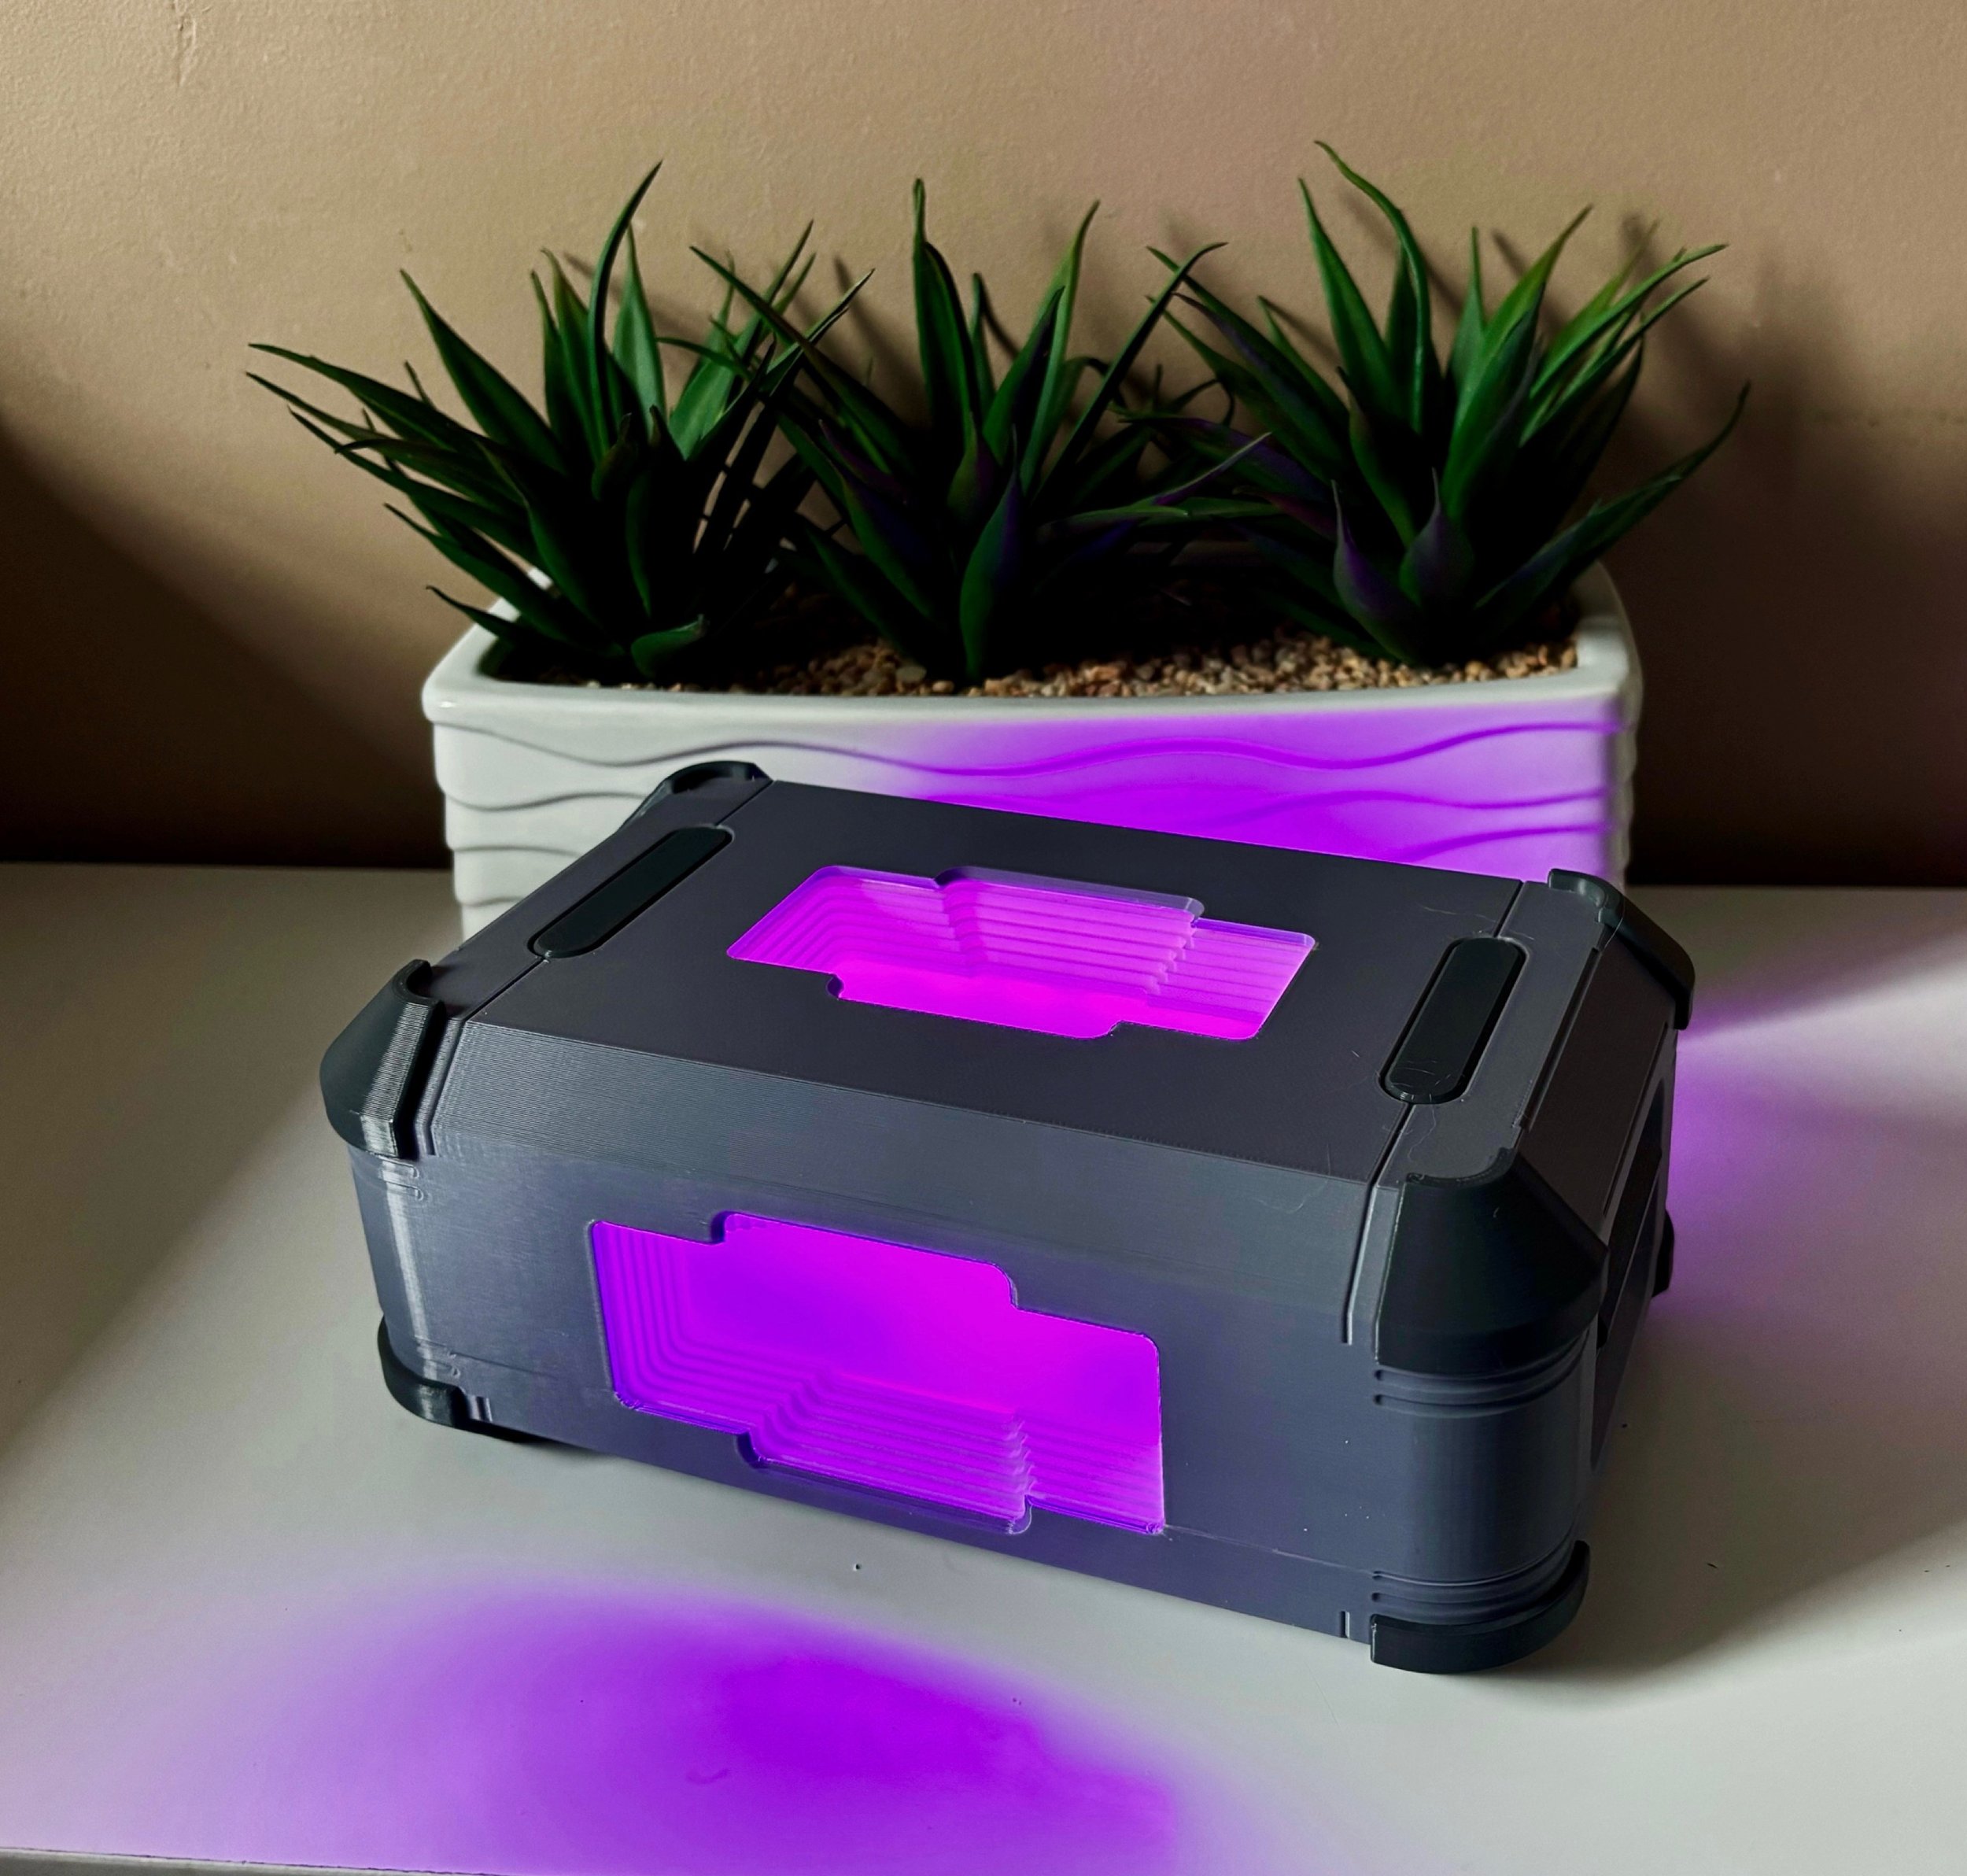
This item is designed to be printed in gray/silver, dark gray/black, and white parts on FDM printers. See file names for colors! For optimal look I’d also recommend 3mm clear acrylic (laser cut) and/or a clear filament/resin so you can see the ‘staircases’ inside the lighted regions. I used frosted spray paint on ‘LIGHT BOX INNER PANEL’ to diffuse the light a little more and block the view of what’s inside.
I am including DXF, STL and STEP in case you want to alter the switch port size, add a rechargeable battery, split the base into multiple parts, whatever you want.
Final product measures 204mm x 84mm x 124mm and the largest printed part is 200 × 80 × 120.
COTS parts:
Switch x 1
12V RGB LED strip x about 1ft / 300mm
1/4” DIA 1/8” THK NdFeB magnetsor equivalent x8 (buy extra in case you lose some it’s a good idea)
You’ll also need soldering skills and supplies, a few feet of wire, electrical tape or heat shrink tubing (recommended) and some glue to hold a few things in place
I used the AA holder and an RGB strip because it’s what I had, but I do plan on modifying this to take a 6V AA pack, 5V regulator, ESP32 and use addressable LED strips for some cool effects in the future. The printed files probably won’t change but if they do I’ll add them here and you can email me for the updated files if you’ve already bought the item.
See image gallery for helpful wiring and assembly instructions.
Please pay attention to the polarity of the magnets installed in the Base and Battery Door. You want the battery door to stay in the base, so the magnets in the base should all be facing the same way with let’s say N facing out, and all the magnets in the battery door should have S facing out. Best to test the fit/hold before gluing :)
Please also pay attention to the polarity of your battery and your LED strips! It seems that having a common + rail and connecting LED channels to ground to turn them on is the convention. I connect the red and blue channels to get ‘purple.’ It is safe to leave the green channel disconnected and you don’t need to worry about covering up the contacts. I do it this way because I’ve found that ‘purple’ LED strips on the market are usually a bit too far into the UV spectrum and won’t look very bright (but they will cure your UV nail polish.)
If you don’t want to install lights in this I’d recommend printing/painting ‘LIGHT BOX INNER PANEL’ purple or your color of choice and keeping the outer panel clear.